Raspberry: Difference between revisions
| Line 699: | Line 699: | ||
== Backup server == | == Backup server == | ||
* https://opensource.com/life/16/3/turn-your-old-raspberry-pi-automatic-backup-server using rdiff-backup utility. | * https://opensource.com/life/16/3/turn-your-old-raspberry-pi-automatic-backup-server using rdiff-backup utility. | ||
== Connect your dumb printer to your home network == | |||
[https://pimylifeup.com/raspberry-pi-print-server/ Raspberry Pi Print Server: Setup a Network Printer] | |||
== Embedded Linux == | == Embedded Linux == | ||
Revision as of 19:10, 19 February 2017
Raspberry Pi
Miscellaneous
- Raspberry pi quick start guide
- Learn and make resources from raspberrypi.org.
- http://elinux.org/RPi_Hub
- http://www.raspberrypi-spy.co.uk/
- wifi setup
# /etc/network/interfaces  file
auto wlan0
allow-hotplug wlan0
iface wlan0 inet dhcp
allow-hotplug wlan0
  wpa-ssid "YOURSSID"
  wpa-psk "YOURPASSWORD
- Berryboot for multiple boots
- video player: omxplayer videofile.mp4. See also the Android app OMX Remote (Raspberry Pi).
- force sound output from analog
- mp3 player: mpg321 "my file.mp3". See https://sites.google.com/site/semilleroadt/home/raspberry-pi about testing sound on Raspberry Pi.
- raspberry pi server
- re-run configuration
- HTG guide to getting started with Raspberry Pi
- A month with raspbian and my Beaglebone page about how to fix/change date/time.
- My youtube video demostrating GPIO function.
- N900 as a remote display
- Use Raspberry Pi behind a proxy http://www.raspberrypi.org/phpBB3/viewtopic.php?f=63&t=13986
- May 2013 issue of Linux Journal
- check current temperatury and cpu freq or this one which contains other RaspPi tricks.
cat /sys/class/thermal/thermal_zone0/temp
This is similar but not the same as the Udoo case where it uses cat /sys/devices/virtual/thermal/thermal_zone0/temp
Different generations
- https://en.wikipedia.org/wiki/Raspberry_Pi
- Raspberry Pi b+
- Raspberry Pi 2 (This has an identical form-factor to the existing Raspberry Pi 1 Model B+)
- Raspberry Pi model B vs B+
Displayport connection
Does not work if I use a hdmi to displayport converter. In general, 'step up' is not working but 'step down' is OK. See discussion.
Write image to SD card
- Command line. The following tip is from zdnet where -p means to extract files to pipe (stdout). In my case, the status=progress option is not recognized.
unzip -p Image | dd of=/dev/sdX bs=4M iflag=fullblock oflag=direct status=progress
- GUI. Etcher.
This is not the end of the process since we cannot use SSH to access Pi. If we follow the instruction to add a 'ssh' to the boot partition, we may get an error SSH problem - Read from socket failed: Connection reset by peer. So it is necessary to hook Pi to a monitor for the first time if we want to access it from SSH.
SSH access
As of the November 2016 release, Raspbian has the SSH server disabled by default. You will have to enable it manually.
For headless setup, SSH can be enabled by placing a file named 'ssh', without any extension, onto the boot partition of the SD card.
See https://www.raspberrypi.org/documentation/remote-access/ssh/
For some reason, I got an error ssh: connect to host raspberrypi.local port 22: Connection refused or “No supported key exchange algorithms. One solution is to generate the keys again Or just wait a little longer for Raspbian to generate keys.
Assign .local domain to Raspberry Pi
Avahi Daemon = Bonjour = Zeroconf = UDP multicast
http://www.howtogeek.com/167190/how-and-why-to-assign-the-.local-domain-to-your-raspberry-pi/
So I can use ssh [email protected] to access RPi.
sudo apt-get update
sudo apt-get install avahi-daemon
# No reboot is necessary for raspberry pi

# from other machines or even Raspi itself
ping raspberrypi.local
The idea was first discovered in Beaglebone.
Set up a static IP address
- https://www.raspberrypi.org/documentation/hardware/raspberrypi/bootmodes/net_tutorial.md
- http://raspberrypi.stackexchange.com/questions/37920/how-do-i-set-up-networking-wifi-static-ip-address (works!)
- https://www.raspberrypi.org/forums/viewtopic.php?f=66&t=140252
sudo systemctl stop dhcpcd.service  # deactivate dhcpcd
sudo nano /etc/network/interfaces
The original interfaces file looks like
# interfaces(5) file used by ifup(8) and ifdown(8)

# Please note that this file is written to be used with dhcpcd
# For static IP, consult /etc/dhcpcd.conf and 'man dhcpcd.conf'

# Include files from /etc/network/interfaces.d:
source-directory /etc/network/interfaces.d

auto lo
iface lo inet loopback

iface eth0 inet manual

allow-hotplug wlan0
iface wlan0 inet manual
    wpa-conf /etc/wpa_supplicant/wpa_supplicant.conf

allow-hotplug wlan1
iface wlan1 inet manual
    wpa-conf /etc/wpa_supplicant/wpa_supplicant.conf
The new interfaces file will look like (You can set either or both eth0 or wlan0). Don't forget to include auto eth0 or it won't work!! auto is used to bring up the interface when ifup is run with the -a option. (This option is used by the system boot scripts.)
auto eth0
iface eth0 inet static
        address 192.168.1.88
        netmask 255.255.255.0
        gateway 192.168.1.1

allow-hotplug wlan0
iface wlan0 inet static
        address 192.168.1.89
        netmask 255.255.255.0
        gateway 192.168.1.1
    wpa-conf /etc/wpa_supplicant/wpa_supplicant.conf
Then disable the DHCP client daemon and switch to standard Debian networking:
sudo systemctl disable dhcpcd
sudo systemctl enable networking
sudo reboot # Reboot for the changes to take effect:
Under voltage
he red LED going out is an indicator that the supply voltage is too low. You should also see a small coloured square in the top corner of the screen. See the posts
- https://www.raspberrypi.org/forums/viewtopic.php?f=63&t=102814&p=711578
- https://www.raspberrypi.org/forums/viewtopic.php?f=63&t=103099&p=713298
Install minimal browser
Note that at the end of sudo make install, it will create an item in the menu -> Internet. From the installation output,
sudo install -g dialout web /usr/bin
sudo install -g audio piradio /usr/local/bin
sudo chmod +x /usr/local/bin/piradio
sudo cp ./web.desktop /usr/share/applications
sudo cp ./minimalwebbrowser.png /usr/share/pixmaps
sudo cp ./web.1.gz /usr/share/man/man1
sudo cp ./web-omxplayer.sh /usr/local/bin
sudo chmod +x /usr/local/bin/web-omxplayer.sh
HDMI screen resolution
If the screen size is small (i.e. you can see black margins on 4 sides), uncomment the line about disable_overscan=1.
# sudo nano /boot/config.txt
disable_overscan=1
On my SainSmart 9" monitor, its native resolution 1024x600 is not supported by Raspberry Pi (/boot/config.txt). The resolution becomes 1280x720 if I don't modify anything.
However, there is a workaround on raspberry pi forum. This technique works on Ubuntu-Mate 15 and Raspbian Jessie versions. The two lines (hdmi_group and hdmi_mode) are quite mysterious on Raspbian Jessie but more clear on Ubuntu-Mate.
...
#hdmi_ignore_edid=0xa5000080
hdmi_cvt=1024 600 60 3 0 0 0
hdmi_group=2
hdmi_mode=87
disable_overscan=1
HDMI monitor
- It works on my Samsung monitor S22C350 (1920x1080).
- SainSmart 7" LCD Display Touch Screen TFT Monitor from amazon or from sainsmart.com. 800x480. $39.99 no touch screen, or $49.99 w/ touch screen. Good reviews.
- 10.1 inch LCD Display 1366x768 HDMI/VGA/NTSC/PAL there are several issues (poor picture quality, flicker a couple times a second, Overheating, nothing appears on the display) reported in comments.
- 10" inch TFT LCD Display w/ HDMI+VGA+Video Driver Board for Raspberry Pi
- 7" TFT LCD Screen Display Monitor for Raspberry Pi B B+ HDMI Board w/ Clear Case
Make your own screen from an old laptop
See the Hardware page.
Audio output
https://www.raspberrypi.org/documentation/configuration/audio-config.md
Method 1 (works on Raspbian or Ubuntu)
amixer cset numid=3 1
Method 2 (works only on Raspbian)
sudo raspi-config
Select Option 8 Advanced Options and hit Enter, then select Option A6: Audio and hit Enter.
Method 3. Edit /boot/config.txt and setting hdmi_drive variable or hdmi_ignore_edid_audio variable. See the Raspberry Pi config.txt web page.
The official Raspberry Pi DSI touch display
- https://www.raspberrypi.org/blog/the-eagerly-awaited-raspberry-pi-display/. There are two videos demonstrating the (multipoint) touch functionality using Kivy (Python GUI development system) library on the website.
800×480 display @60fps, 24-bit colour, FT5406 10 point capacitive touchscreen, 70 degree viewing angle, Metal-backed display with mounting holes for the Pi
Adafruit touch screen for Raspi
- PiTFT Assembled 320x240 2.8" TFT $35
RCA video output resolution
http://www.raspberrypi.org/phpBB3/viewtopic.php?f=29&t=47527
Hardware acceleration video player
Use omxplayer not VLC. When I use omxplayer to play mp4 videos, htop shows CPUs are not used and the playback is quite smooth. VLC will have a hard time playing the mp4 videos (black screen) not to say all 4 cores are 100% busy on Raspi2.
- http://elinux.org/Omxplayer
- http://kodi.wiki/view/Raspberry_Pi_FAQ
- Minimal Kiosk Browser: Kweb - Fast Reliable Web Browser for Raspberry Pi PC.
- Linuc command to query video driver
lspci -nnk | grep -i vga -A3 | grep 'in use'
It shows 'nouvea' for my PC Desktop which uses NVIDIA gpu. The command does not work on my Ubuntu-Mate.
pi@pi-ubuntu:~$ lspci -nnk | grep -i vga -A3 | grep 'in use'
pcilib: Cannot open /proc/bus/pci
lspci: Cannot find any working access method.
Memory
When I use 'free -m' or 'htop' command in Raspbian, I see the total memory size only 373MB (Beaglebone black shows 496MB in htop). The reason is Raspbian reserved 128MB for GPU. See
cat /boot/config.txt
Watch youtube with Raspbian
- http://www.raspberrypi.org/forums/viewtopic.php?t=40860
- http://www.raspi.today/5-things-you-need-to-know-about-the-raspberry-pis-epiphany-web-browser/ and an announcement from raspberrypi.org.
- http://www.raspians.com/Knowledgebase/how-to-watch-youtube-on-the-raspberry-pi/
- http://raspberrypi.stackexchange.com/questions/13955/watch-youtube-in-browser-with-raspbian
- http://93.93.128.176/forums/viewtopic.php?t=59384&p=445257
Probably a practical approach is to use 'youtube-dl' program to download the video and then use 'omxplayer' to play it (not streaming anyway).
Startup script
- http://www.stuffaboutcode.com/2012/06/raspberry-pi-run-program-at-start-up.html. The procedure works for tightvncserver and live-streaming examples. Note that running tightvncserver will use a lot of Raspberry Pi CPU (> 80%).
sudo nano /etc/init.d/NameOfYourScript # Create script in /etc/init.d

sudo chmod 755 /etc/init.d/NameOfYourScript # Make script executable

sudo /etc/init.d/NameOfYourScript start # Test starting the program

sudo /etc/init.d/NameOfYourScript stop # Test stopping the program

# Register your script to be run at start-up and shutdown, run the following command:
sudo update-rc.d NameOfYourScript defaults

# If you ever want to remove the script from start-up, run the following command:
sudo update-rc.d -f  NameOfYourScript remove
Disk Performance
CPU Benchmark
- Raspberry Pi 3 (launched 2/29/2016)
- SysBench, nBench, Power, MemTester and more from Element14
- http://makezine.com/2016/02/28/meet-the-new-raspberry-pi-3/ (and the original post https://www.raspberrypi.org/blog/raspberry-pi-3-on-sale/)
- https://www.raspberrypi.org/magpi/raspberry-pi-3-specs-benchmarks/
- http://lifehacker.com/how-the-raspberry-pi-3-benchmarks-against-older-models-1762417275
- http://www.phoronix.com/scan.php?page=article&item=raspberry-pi-3&num=1
- Raspberry Pi 2 runs nbench and sysbench by Adafruit.
- hackday.com. It includes info about OpenGL benchmark.
- http://www.linuxlinks.com/article/20150305172325136/RaspberryPi2-Benchmarks.html
# RPi 1
pi@raspberrypi:~ $ sysbench --num-threads=1 --test=cpu --cpu-max-prime=20000 --validate run
sysbench 0.4.12:  multi-threaded system evaluation benchmark

Running the test with following options:
Number of threads: 1
Additional request validation enabled.


Doing CPU performance benchmark

Threads started!
Done.

Maximum prime number checked in CPU test: 20000


Test execution summary:
    total time:                          1412.6014s
    total number of events:              10000
    total time taken by event execution: 1412.5301
    per-request statistics:
         min:                                132.41ms
         avg:                                141.25ms
         max:                                403.27ms
         approx.  95 percentile:             172.59ms

Threads fairness:
    events (avg/stddev):           10000.0000/0.00
    execution time (avg/stddev):   1412.5301/0.00
The timing 1412s I got is close to 1318s reported by element14.com.
For nBench, my result of cpu floating-point index 1.753 is also close to element14's 1.884.
pi@raspberrypi:~/nbench-byte-2.2.3 $ ./nbench

BYTEmark* Native Mode Benchmark ver. 2 (10/95)
Index-split by Andrew D. Balsa (11/97)
Linux/Unix* port by Uwe F. Mayer (12/96,11/97)

TEST                : Iterations/sec.  : Old Index   : New Index
                    :                  : Pentium 90* : AMD K6/233*
--------------------:------------------:-------------:------------
NUMERIC SORT        :          202.91  :       5.20  :       1.71
STRING SORT         :          30.842  :      13.78  :       2.13
BITFIELD            :      8.2161e+07  :      14.09  :       2.94
FP EMULATION        :          43.409  :      20.83  :       4.81
FOURIER             :          1660.8  :       1.89  :       1.06
ASSIGNMENT          :          2.2719  :       8.65  :       2.24
IDEA                :          702.86  :      10.75  :       3.19
HUFFMAN             :          421.78  :      11.70  :       3.73
NEURAL NET          :          2.7206  :       4.37  :       1.84
LU DECOMPOSITION    :          73.846  :       3.83  :       2.76
==========================ORIGINAL BYTEMARK RESULTS==========================
INTEGER INDEX       : 11.255
FLOATING-POINT INDEX: 3.161
Baseline (MSDOS*)   : Pentium* 90, 256 KB L2-cache, Watcom* compiler 10.0
==============================LINUX DATA BELOW===============================
CPU                 : ARMv6-compatible processor rev 7 (v6l)
L2 Cache            :
OS                  : Linux 4.1.13+
C compiler          : gcc version 4.9.2 (Raspbian 4.9.2-10)
libc                : libc-2.19.so
MEMORY INDEX        : 2.415
INTEGER INDEX       : 3.146
FLOATING-POINT INDEX: 1.753
Baseline (LINUX)    : AMD K6/233*, 512 KB L2-cache, gcc 2.7.2.3, libc-5.4.38
* Trademarks are property of their respective holder.
OpenGL
Picademy
UPS
Books, Magazines
Minecraft
Installation
Make sure to use a class 10 (micro)SD card to avoid a hanging problem. This rule applies to other SoC device like Beaglebone and Udoo.
Download an image
It is suggested to use torrent to download. In my experience to downloading Raspbian, the number of peers is 50 and the download speed is about 8MB/s.
The best way of using Raspberry Pi is being able to run multiboot; that is, we have a list of operating systems we can choose to boot.
- NOOBS
- BerryBoot (just a simple operating system installer, the camera cannot be enabled. The multiple choices of OSs in BerryBoot is now available in NOOBS)
Format a SD card using SD Formatter (Windows & Mac)
Install an image to a SD card
For example, if I want to install coder, I first download/uncompress the file. Then from the linux command line (assume microSD card is on /dev/sdc)
sudo umount /dev/sdc*
sudo dd bs=4M if=Downloads/coder_v0.4/raspi.img of=/dev/sdc; sync
If I want to watch the progress, I can open another terminal and issue
sudo pkill -USR1 -n -x dd
The output of it still is shown on the 1st terminal where dd is issued. The output looks like
224+0 records in
224+0 records out
939524096 bytes (940 MB) copied, 40.9672 s, 22.9 MB/s
268+0 records in
268+0 records out
1124073472 bytes (1.1 GB) copied, 62.7471 s, 17.9 MB/s
Monitor the progress using pipe viewer
- http://blog.urfix.com/9-tricks-pv-pipe-viewer/
- http://askubuntu.com/questions/215505/how-do-you-monitor-the-progress-of-dd
- https://wiki.archlinux.org/index.php/core_utilities
sudo apt-get install pv
dd if=/dev/urandom | pv | dd of=/dev/null
Wifi setup
A new wifi setup is included in the Raspbian. It is called dhcpcd and dhcpcd-ui. The package name is called 'raspberrypi-net-mods'. PS. the old way is called 'wpa_gui'.
See the blog on May 5, 2015.
Remote desktop
Dataplicity
It is not remote desktop but it allows you to access Raspberry Pi from any web browser (no router change, no VPN, no port forward).
NoMachine
Tips on how to set up your Raspberry Pi for remote access via NoMachine
RealVNC server
- Do not download the binary from RealVNC website since it will have a license issue when we want to connect to RPi
- Use the instruction at Github
- On linux client side, we can download the binary tar ball and set it executable after untar it.
Connect to Your Raspberry Pi From Anywhere In World With VNC Connect
- https://www.raspberrypi.org/blog/get-back-to-my-pi-from-anywhere-with-vnc-connect/
- http://lifehacker.com/you-can-now-easily-connect-to-your-raspberry-pi-from-an-1792438276
Connection to Raspberry Pi with tightvnc
- http://elinux.org/RPi_VNC_Server
- https://wiki.ubuntu.com/Lubuntu/RemoteDesktop (Lubuntu specific)
- http://www.howtogeek.com/141157/how-to-configure-your-raspberry-pi-for-remote-shell-desktop-and-file-transfer/2/
A simple password like 'raspberry' would work. If we need to reset the password, use vncpasswd command.
# Server side
sudo apt-get install tightvncserver
vncserver
# You will require a password to access your desktops.
# Password:
# Warning: password truncated to the length of 8.
# Verify:
# Would you like to enter a view-only password (y/n)? n
#
# New 'X' desktop is raspberrypi:1
#
# Creating default startup script /home/pi/.vnc/xstartup
# Starting applications specified in /home/pi/.vnc/xstartup
# Log file is /home/pi/.vnc/raspberrypi:1.log
ps -ef | grep vnc
# pi        3134     1  0 16:59 pts/0    00:00:00 Xtightvnc :1 -desktop X -auth /home/pi/.Xauthority
# -geometry 1024x768 -depth 24 -rfbwait 120000 -rfbauth /home/pi/.vnc/passwd -rfbport 5901 -fp
# /usr/share/fonts/X11/misc/,/usr/share/fonts/X11/Type1/,/usr/share/fonts/X11/75dpi/,/usr/share/fonts/X# 11/100dpi/ -co /etc/X11/rgb
# pi        3217  2666  0 17:01 pts/0    00:00:00 grep --color=auto tightvnc

vncserver             # This line seems not necessary
vncserver –kill :1

# Client side; the most common mistake is to forget to add the port number to the IP address.
sudo apt-get install xtightvncviewer
xtightvncviewer 10.42.0.37:1
# It does not work if I just use raspberrypi.local:1 as the address
To start the tightvnc automatically when boot up, check out http://www.penguintutor.com/linux/tightvnc or my note on BBB.
Also note if the server uses '/usr/bin/vncserver :0', then the client uses 'xtightvncviewer 10.42.0.37'. But if the server uses '/usr/bin/vncserver :1', the client should uses 'xtightvncviewer 10.42.0.37:1', etc. Got the idea!
Note that to troubleshoot the message "GDBus Error:org freedesktop.PolicyKit1 Error.Failed; An Authentication agent already exixts for the given subject", follow the instruction at this message.
Connection from Raspberry Pi to Ubuntu
Follow the instruction and install xtightvncviewer using sudo apt-get and it works. To run the vnc client, just type 'xtightvncviewer' on the terminal.
Another instruction of using tightvnc is at http://www.penguintutor.com/linux/tightvnc.
I have successfully to follow the instruction at http://www.hiddentao.com/archives/2013/09/17/setting-up-tightvnc-on-ubuntu-12-04/ to connect to Ubuntu 12.04 (Unity desktop) from Xubuntu. After launching the following line in my local machine
ssh -L 5901:localhost:5901 [email protected]
I open another terminal window and type the following in my local machine
xtightvncviewer localhost:5901
the Ubuntu desktop appears on my local machine.
Connection from Raspberry Pi to Windows (RDP) with freerdp or rdesktop
The idea is to use Raspberry Pi as a thin client. For example, I can open two remote desktop connections to two separate Windows VMs and the RPi is still quite free in terms of its resource.
http://blog.pi3g.com/2013/04/use-windows-remote-desktop-on-the-raspberry-pi/
Method 1 Use xfreerdp program. Use Ctrl+Alt+Enter to toggle between full and regular screen. Non-full-screen-mode is useful if we want to monitor the RPi resource usage while we are using the remote desktop connection.
1. Open a root terminal. Run
apt-get update
apt-get install freerdp
2. Open a regular terminal. Run
xfreerdp -u brb -x l -z 192.168.1.4
Method 2 We can also use rdesktop program. rdesktop is a free, open source client for Microsoft's proprietary RDP protocol. See wiki.archlinux.org for more tips and tricks about rdesktop.
1. Open a root terminal and run
apt-get update
apt-get install rdesktop
2. Open a regular terminal and run (-f means full screen. Or we can use -g 1280x700 to specify the display resolution)
rdesktop -f -u brb 192.168.1.4
Method 3 There is also an interesting project called RPi-TC/Raspberry Pi Thin Client project. I have not tried it yet.
Raspbian
Directly Connect to a Raspberry Pi Without Internet
http://www.makeuseof.com/tag/directly-connect-raspberry-pi-without-internet/
Raspbian repository and mirrors
- https://www.raspberrypi.org/downloads/raspbian/
- http://www.raspbian.org/RaspbianMirrors
- UMD mirror (http|rsync)://mirror.umd.edu/raspbian/raspbian
Releases lists
Raspbian package repository URL
http://archive.raspbian.org/raspbian/pool/main/r/r-base/
Fix Dirty COW
https://www.raspberrypi.org/blog/fix-dirty-cow-raspberry-pi/ (10/25/2016)
Kernel building
- https://www.raspberrypi.org/documentation/linux/kernel/building.md
- http://elinux.org/Raspberry_Pi_Kernel_Compilation
Create a custom kernel using Vagrant
Emulate Raspbian on Linux/Windows
Emulate Intel X86 on raspberry Pi (ARM)
https://eltechs.com/product/exagear-desktop/ (non-free)
Browser
GNOME Web/Epiphany browser
This is the default in Raspbian Jessie.
Some annoying thing is the browser is using the DuckDuckGo as the search engine which is not configurable.
Some web pages cannot be shown correctly (see my comment in LuaKit)
LuaKit - an extremely lightweight browser based on webkit and GTK+
This is very cool. It solves the issue of using Web to open http://magazine.odroid.com. It even supports Adobe Flash (eg some videos from Amazon.com)
sudo apt-get install luakit
Mastering keybinds is the key to use it (Even a mouse cannot be used to close a Tab).
Some examples:
- j/k to scroll down/up
- space or ctrl+d / Ctrl+u to scroll down/up one page
- h/l to scroll left/right
- +/- to zoom in/out.
- (ctrl + o) OR (shift + h) to go to the previous page. Ctrl + i to go forward.
- forward slash (/) to search within the page. Use n to find the next occurrance, N to find the previous one.
- B for bookmark
- gB to show bookmarks
- gH to go to home page
- : command mode
- Esc normal mode
- t open webpage in new tab
- d delete current tab
- :print print page
We can modify the key bindings. I run
sudo nano /etc/xdg/luakit/binds.lua
and on line 321 about "Go back in the browser history" (search the keyword 'history'): change "H" to "b". Now I can hit the lowercase 'b' button to go back to a previous web page instead of Shift+h.
    key({}, "b", "Go back in the browser history `[count=1]` items.",
        function (w, m) w:back(m.count) end),
Iceweasel browser
This browser looks like a clone of Firefox (firefox is not available in the repository). The version in Raspbian Jessie is 38.4.0. If iceweasel is not installed (e.g. jessie 8.0), we can install it by
sudo apt-get install iceweasel --no-install-recommends
Firefox browser
See Iceweasel above. Firefox package has been replaced by Iceweasel so it is not available via apt-get install.
Bluetooth keyboard
The GUI program blueman does not work on the pairing step (it does not accept my entered keys) for my bluetooth keyboard (my bluetooth mouse works).
My working example is to use the command line way (bluetoothctl). The bluetoothctl utility is part of the bluez package I think. Raspbian Jessie does not have the bluez-utils package). See https://wiki.archlinux.org/index.php/Bluetooth
# Press the 'connect' button on the bluetooth keyboard first!
$ bluetoothctl # no sudo is needed
[bluetooth] default-agent
[bluetooth] scan on
[bluetooth] pair 90:7F:61:8F:D0:38        # it will ask to enter a pin code
[bluetooth] connect 90:7F:61:8F:D0:38
It is also interesting to see bluetooth related programs under /usr/bin directory. Those programs shown on my Raspbian are quite different from the ones shown on my Ubuntu 14.04.
New Bluetooth GUI in Raspbian
https://www.raspberrypi.org/blog/another-update-raspbian/ (May 13, 2016). This should solve the problem mentioned above though I haven't tried it.
Turn Raspberry Pi Zero into a USB gadget
- http://blog.gbaman.info/?p=791 (this can only work with the RPi Zero). Allowing ssh, sftp, vnc etc over a single usb cable.
OpenElec
I use NOOBS to install OpenElec with Raspbian.
Still there is no a regular web browser. Not a joke. Remember OpenElec is installed in multiboot mode through NOOBS. Probably a better approach is to consider Arch-Linux.
There is a program called 'Web viewer'. Wonder when would it be useful.
Need to change 2 settings in order to get date & time correctly.
Another installation method is to download/install the image directly from the OpenELEC website. See
- http://openelec.tv/get-openelec
- http://wiki.openelec.tv/index.php/HOW-TO:Installing_OpenELEC/Writing_The_Disk_Image
SMS server
Kodi black screen when exit
A temporary solution is use Ctrl + Alt + F2 then Ctrl + Alt + F1. See
- https://www.raspberrypi.org/forums/viewtopic.php?t=91111&p=637126.
- https://gist.github.com/aperezm-vlex/75d7481afff0db8f5894 A script to fix this problem. Some people have issues.
- https://www.raspberrypi.org/forums/viewtopic.php?t=139758&p=926771. Create a new file by sudo nano /usr/local/bin/startkodi. chmod +x and put the following.
    #!/bin/bash
    fbset_bin=`which fbset`
    xset_bin=`which xset`
    xrefresh_bin=`which xrefresh`
    if [ ! -z $fbset_bin ]; then
      DEPTH2=`$fbset_bin | head -3 | tail -1 | cut -d " " -f 10`
    fi
    kodi "$@"
    if [ ! -z $fbset_bin ]; then
      if [ "$DEPTH2" == "8" ]; then
        DEPTH1=16
      else
        DEPTH1=8
      fi
      $fbset_bin -depth $DEPTH1 > /dev/null 2>&1
      $fbset_bin -depth $DEPTH2 > /dev/null 2>&1
    fi
    if [ ! -z $xset_bin ] && [ ! -z $xrefresh_bin ]; then
      if [ -z $DISPLAY ]; then
        DISPLAY=":0"
      fi

      $xset_bin -display $DISPLAY -q > /dev/null 2>&1
        if [ "$?" == "0" ]; then
          $xrefresh_bin -display $DISPLAY > /dev/null 2>&1
        fi
    fi
    VT="$(fgconsole)"
    if [ "$VT" ]; then
      sudo chvt 7
      sudo chvt "$VT"
    fi
#!/bin/bash
kodi
if [ "$?" = "0" ]; then
killall kodi
fbset -depth 8 && fbset -depth 16
xrefresh
fi
Corebird - twitter client
We also need automake, autoconf, autogen, intltool packages.
Unfortunately running ./autogen.sh --prefix=/usr gets stuck at the error message 'configure error: valac >= 0.28.0 is required'. At this moment, valac has a version 0.26. See https://packages.debian.org/jessie/valac.
Backup server
- https://opensource.com/life/16/3/turn-your-old-raspberry-pi-automatic-backup-server using rdiff-backup utility.
Connect your dumb printer to your home network
Raspberry Pi Print Server: Setup a Network Printer
Embedded Linux
What I Wish I’d Known When I Was an Embedded Linux Newbie from Linux Journal.
Virtualization
Virtualizing a Raspberry Pi with QEMU
Mate Ubuntu
The desktop looks good. But it does not include Mathematica software nor Arduino. It does include Scratch, Sonic Pi (under Programming) and Minecraft Pi (under Games).
After Raspi2 is on for several days with Firefox browser use, the memory is getting lost even Firefox is closed. top command shows /usr/sbin/irqbalance ate 48% memory. It works when I use sudo kill -9 to stop the process. See some discussions at askubuntu.com set ENABLED=0 in /etc/default/irqbalance.
The system looks very stable. See my screenshots below.
Install more screensaver themes
http://greyblake.com/blog/2013/02/02/install-more-screensavers-on-mate-desktop/
Take a look at the .desktop files under /usr/share/applications/screensavers.
Web browser
Ubuntu-Mate includes Firefox. I can feel FF is more slow than the browser in Raspbian.
Printer
(Update 12/11/2016): the instruction below using PPD file still has a problem when I print pdf files. The instruction here solves the problem. The idea is to download the official Linux driver (<linux-brprinter-installer-2.1.1-1.gz>) from brother website HL-5250DN.
When I try to add a new Printer (network printer, Brother HL-5250DN) through automatic detected method, I got an error "server-error-internal-error". When I looked at the /var/log/cups/error_log file, it showed "empty PPD file". The following two pages are helpful.
- https://bugs.launchpad.net/ubuntu/+source/system-config-printer/+bug/254202
- http://www.openprinting.org/printer/Brother/Brother-HL-5250DN (PPD file). A copy of the ppd file (a text file) is saved on github.
The manual approach mentioned in bugs.launchpad.net (#6) works.
- System -> Adminstration -> Printers -> Add
- Enter URI and specify ipp://192.168.1.88:631/ipp as the Device URI (the address is obtained through the nmap command and look for port 631)
- Check the 2nd option 'Provide PPD file' instead of the 1st one 'Select printer from database'.
- Browse the location of the PPD file
- Continue the procedure until the end. We can print a test page to make sure the setup is successful.
The printer test page said the driver is BR5250_2.PPD and version 1.03.
PS. About the technology terms
- PPD (PostScript Printer Description)
- URI (Uniform Resource Identifier)
- IPP (Internet Printing Protocol)
Kodi
After I used apt-get to install Kodi, Kodi will not be able to launch:( On Raspbian, the Kodi installed by apt-get works!!!
Arch Linux
Kodi can be installed in ArchLinux by installing the kodi-rbp package. See wiki.archlinux.org.
Android
Assuming you have Raspi 2 B,
- RaspAnd($9), currently it is Android 5.1.
pi-top
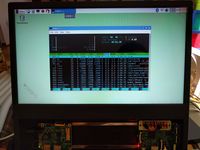
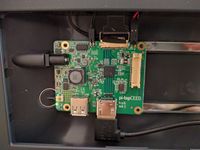
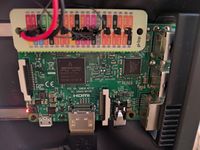
I pledged pi-topCEED ($99 + shipping is $25). The hardware looks cool: 14 inch, 1366x768 resolution & a GPIO card that helps to connect 3 wires from pi-top hub to Raspberry Pi. One problem is after connecting the wires from pi-top hub to Raspberry Pi, there is not enough space for me to slide in the cover.
Unfortunately the pi-top OS is unstable (tested 7/1/2016).
- first try - screen flicked & is frozen
- I download the image (homepage -> Community -> FAQ) and write it to the sd card - works great but after another boot the screen appeared and then disappeared.
I found when I connect the wires of 3-pins with a wrong direction, Raspi still works (pi-top OS & Raspbian.
For some reason, after I shut down the computer the back light is still on. The software from rricharz in github can let Rasbpian users to change the brightness of the screen and also power off the pi-top (bright light off). The original post is on the pi-top forum with the subject 'Using standard Raspbian Jessie on pi-top'.
Forum. We can use Google account to join.
Some pictures (left: Pi-top, middle: pi-top hub, right: raspberry pi 3 with a GPIO card)
Plex
How to Turn a Raspberry Pi into a Cheap Plex Player with RasPlex
Kodi/XBMC and OpenElec
- Install Kodi on Raspbian
- For some reason, I did not find 'Display Mode' option in the System > Settings > System > Video Output in the OpenElec. When I install Kodi (14.2 Mar 27 2015) in Ubuntu 14.04, I can see this option.
Then OpenElec from NOOB works fine.
12 Ways to Make Kodi the Best Media Player for You
http://www.makeuseof.com/tag/make-kodi-best-media-player/
What is OpenElec
Unlike other Kodi solutions, OpenELEC is not based on Ubuntu. In fact, it's not based on any Linux distribution; OpenELEC has been built from scratch specifically to act as a media center. That means it doesn't include drivers for things that just won't be used like 3G cards and graphics tablets, for example.
OpenELEC, however, only includes software required to run Kodi. Because of that it is tiny (roughly 150MB), it installs literally in minutes, and, it can boot extremely quickly in 5-20 seconds, depending on the hardware type used.
In addition, OpenELEC is designed to be managed as an appliance: it can automatically update itself and can be managed entirely from within the graphical interface. Even though it runs on Linux, you will never need to see a management console, command terminal or have Linux knowledge to use it.
Default folders for OpenElec
OpenELEC:~ # ls
backup       emulators    music        screenshots  videos
downloads    lost+found   pictures     tvshows
OpenELEC:~ # df -h
Filesystem                Size      Used Available Use% Mounted on
devtmpfs                165.2M         0    165.2M   0% /dev
/dev/mmcblk0p5          159.8M    103.7M     56.1M  65% /flash
/dev/mmcblk0p6           13.3G    706.6M     11.9G   5% /storage
/dev/loop0               93.9M     93.9M         0 100% /
tmpfs                   170.2M         0    170.2M   0% /dev/shm
tmpfs                   170.2M      4.6M    165.6M   3% /run
tmpfs                   170.2M         0    170.2M   0% /sys/fs/cgroup
tmpfs                   170.2M      4.0K    170.2M   0% /tmp
tmpfs                   170.2M    412.0K    169.8M   0% /var
/dev/mmcblk0p1          820.2M    744.4M     75.8M  91% /var/media/RECOVERY
/dev/mmcblk0p3           27.0M      1.2M     23.5M   5% /var/media/SETTINGS
Youtube plugin error
How to Fix Kodi’s YouTube “Quota Exceeded” Problem
How to Cast YouTube and Other Web Videos to Kodi (Like the Chromecast)
No sound
http://forum.kodi.tv/showthread.php?tid=130371
Click on the Volume icon and raise the volume from the default -60dB to a higher value.
Fix date/time in OpenElec
http://www.htpcbeginner.com/fix-openelec-incorrect-time-raspberry-pi/
Note the original post does not work on the current Kodi 14.1. The utility /usr/sbin/ntpdate is not found. Search the keyword 'daCaPo says' on the above webpage and following his answer does solve the problem. nano /storage/.config/autostart.sh and add the following
#!/bin/sh
(sleep 30; \
/sbin/ntpd -p pool.ntp.org; \
)&
Then chmod +x /storage/.config/autostart.sh. No need to reboot.
UPnP
When I enable the UPnP server function in Kodi, the Kodi can be found in the UPnp client program eg VLC (desktop), BubleUPnP, BSPlayer, Kodi, ....
The Kodi server will be seen to have Music Library and Video Library. The files in Video Library are the same as what I have in the Kodi but the Music Library does not have any songs (it only has Categories like Genres, Artists, Albums, Songs, Years, Top 100, Recently added albums, Recently played albums). According to this Kodi's wiki page: Your audio files MUST have a valid ID tag for them to work properly in the Kodi music library. . Probably it is for this reason, the songs do not appear in the UPnP client software (except the BSPlayer which can find all my songs in the music directory, but BSPlayer does not show my image files in the pictures directory. Such a pity!)
Display Chinese characters
http://forum.kodi.tv/showthread.php?tid=81081
Go to System - Settings - Appearance - Font and choose 'Arial'.
Add-ons
The USTV VoD and Navi-X and USTVNow (require US citizen & registration, free NBC, CBS, ABC, CW, FOX & PBS channels) work well. Just download the zip files in the linux and install them from xbmc -> system -> add ons -> install from local zip files.
- Power Up Your XBMC Installation with These Awesome Add-Ons
- How to Make XBMC Easier to Use (Especially for Non-Geeks)
- Keyboard shortcut. For example, backslash \ for toggle full-screen and windowed mode.
- xbmchub maintenance and fix buffering problem.
- 5 Best Live TV Addons For Kodi
- TVADDONS - A Collection of Unofficial Addons for Kodi.
- How to install Exodus for Kodi
- Youtube Youtube addon included in Kodi is marked for deletion. Use this link to download the zip file (5.1.20.1) install the new it.
Take a screenshot
ssh and run
kodi-send --action="TakeScreenshot"
A new file <screenshot000.png> will be saved under screenshots folder.
LXDE (same as Lubuntu) X11 desktop environment used by Raspbian OS
Inside .config/lxpanel is a directory with the name of your current lxsession profile - and inside this is a further subdirectory called panels.Each file in this directory is the definition of a single panel. See Magpi33.pdf.
Screenshots
Quick launch bar
To add lxterminal to quick launch bar,
Right click any empty space on taskbar
-> Panel Setting
-> Panel Preferences
-> Panel Applets
-> Application launch bar & Edit
-> Accessories & lxterminal
We can use the same procedure to add Midori to the quick launch bar.
Keyboard shortcut
The shortcuts are defined in the file ~/.config/openbox/lxde-rc.xml
For example,
- open the lxpanelctl menu, click Ctrl + ESC.
- open launch an application, click Windows + r.
- Toggle full screen, Alt + F11.
- Launch task manager, Ctrl + Alt + Del.
Get internet by sharing the internet from another machine
- https://wiki.archlinux.org/index.php/Internet_Share
- static iP. Set up host eth0 IP and then set up RPi IP:
- In Windows, allow Internet sharing. An IP of 192.168.0.2 will be automatically assigned to the Laptop's network card. Make static IP of 192.168.0.2 in Rasp Pi. Enter subnet mask and gateway (192.168.0.1). Also make an entry in /etc/resolv.conf with nameserver=192.168.0.1. Reboot and Rasp Pi will get Net all right.
- In Linux, An IP of 10.42.0.37 will be assigned to eth0 card. Make static IP of 10.42.0.37 in Rasp Pi. Enter subset mask and gateway (10.42.0.1). Also make an entry in /etc/resolv.conf with nameserver=10.42.0.1. Reboot and Rasp Pi will get Net all right.
- Other thoughts:
sudo nano /etc/network/interfaces

iface eth0 inet static
address 192.168.100.1
netmask 255.255.255.0
network 192.168.100.0
broadcast 192.168.100.255
gateway 192.168.100.254
The gateway is important and in most cases will always point to your firewalls, switch or routers IP address.
In my current setting, the host machine's eth0 has IP 10.42.0.1 (inet addr). The RPi has IP 10.42.0.37 and gateway 10.42.0.1.
$ netstat -rn
Kernel IP routing table
Destination     Gateway         Genmask         Flags   MSS Window  irtt Iface
0.0.0.0         192.168.1.1     0.0.0.0         UG        0 0          0 wlan0
10.42.0.0       0.0.0.0         255.255.255.0   U         0 0          0 eth0
169.254.0.0     0.0.0.0         255.255.0.0     U         0 0          0 wlan0
192.168.1.0     0.0.0.0         255.255.255.0   U         0 0          0 wlan0
And /etc/resolv.conf may be worth to be changed too. /etc/hostname and /etc/hosts are unnecessary.
An example of /etc/resolv.conf (set up linux DNS) shown from my RPi is
nameserver 10.42.0.1
But maybe another choice is nameserver 8.8.8.8.
Some tools for discovering the IPs in a network include Fing (iOS/Android) or Scapy (python).
Get internet from mobile tethering
https://github.com/InitialState/rpi-gps/wiki/10%20Part%203.%20Mobile%20Data
IP scan tools
- arp (fastest, installed by default)
arp -a
arp -a -i eth1      # if eth1 comes from a USB ethernet adapter
sudo fing -n 192.168.1.1/24
where /24 means 'network prefix' size 24 bits. Check wikipedia classless inter domain routing. For example, CIDR notation 192.168.100.0/24 would be equivalent to 192.168.100.0/255.255.255.0.
- Angry ip scanner cross platform. open source. Basic knowledge on internet protocol. However, it is slow and show all instead of found ip's.
- netbios. It does not discover linux boxes, however.
Clustering
with 2 Pis
This Linux Journal article teaches how to run GlusterFS Server on two Raspberry Pis. This is also called redundant filesystem. So if one Pi is down, the other keeps the system up.
4 Pis
http://makezine.com/projects/build-a-compact-4-node-raspberry-pi-cluster/. It also shows how to display IP on 1 4pins 16x2 LCD (worked for Arduino & Raspberry Pi). No fancy software were installed to make the cluster.
Hadoop
Docker swarm
Qt on Raspberry Pi
Check out https://qt-project.org/wiki/Qt-RaspberryPi
Native build Qt
http://qt-project.org/wiki/Native_Build_of_Qt5_on_a_Raspberry_Pi
Qt-Creator
Raspberry Pi 2
Raspberry Pi 2 (Armv7 with quad core cpu and 1GB RAM) brings its hardware to the minimum requirements for several interesting projects. I got one from my local microcenter store ($35 + tax).
One interesting thing is the Raspbian or Docker supports Raspberry Pi 1 and 2 (different ARM architectures).
Ubuntu Snappy
Some more information about ubuntu snappy (username/password is ubuntu/ubuntu):
- http://www.ubuntu.com/cloud/tools/snappy
- http://developer.ubuntu.com/en/snappy/
- http://www.ubuntu.com/things#try-beaglebone
- http://www.viclog.com/entry/snappy-raspberry-pi-2-snap-pi (this matches what I observe)
- https://darrenjw2.wordpress.com/2015/02/07/getting-started-with-snappy-ubuntu-core-on-the-raspberry-pi-2/
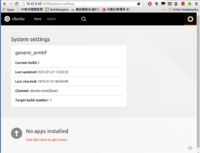
Suppose I connect my Raspberry Pi 2 get its internet through my computer's USB-ethernet adapter. Then once RPi 2 is on, I can open my browser on my host PC and go to http://webdm.local:4200/. It shows
Note that the SNAPPY UBUNTU CORE image for RPi seems buggy. For example,
ubuntu@localhost:~$ sudo su
root@localhost:/home/ubuntu# dpkg-reconfigure tzdata
cp: cannot create regular file '/etc/localtime.dpkg-new': Read-only file system

Current default time zone: 'America/New_York'
Local time is now:      Thu Jan  1 01:01:42 UTC 1970.
Universal Time is now:  Thu Jan  1 01:01:42 UTC 1970.

debconf: DbDriver "config": could not write /var/cache/debconf/config.dat-new: Read-only file system

root@localhost:/home/ubuntu# snappy info
release: ubuntu-core/devel
frameworks: webdm
apps:
root@localhost:/home/ubuntu# snappy versions
Traceback (most recent call last):
  File "/usr/bin/snappy", line 25, in <module>
    status = Main().__main__()
  File "/usr/lib/python3/dist-packages/snappy/main.py", line 195, in __main__
    return callback(args)
  File "/usr/lib/python3/dist-packages/snappy/main.py", line 334, in _do_versions
    click_versions = ClickDataSource().versions(all)
  File "/usr/lib/python3/dist-packages/snappy/click.py", line 189, in versions
    all_updates_list = repo.get_upgradable()
  File "/usr/lib/python3/dist-packages/click/repository.py", line 183, in get_upgradable
    headers={"content-type": "application/json"})
  File "/usr/lib/python3/dist-packages/click/network.py", line 70, in http_request
    curl.perform()
pycurl.error: (60, 'server certificate verification failed. CAfile: /etc/ssl/certs/ca-certificates.crt CRLfile: none')
Docker
- http://blog.hypriot.com/heavily-armed-after-major-upgrade-raspberry-pi-with-docker-1-dot-5-0
- Is that a Docker Engine in your pocket??
Coding
Scratch
Connect Arduino to Raspberry Pi
- See doctormonk.com where python-serial module is used and /dev/ttyACM0 is the serial port or the name for the USB interface to the Arduino Uno.
- Serial port programming
- https://learn.adafruit.com/arduino-lesson-17-email-sending-movement-detector?view=all (closer to Arduino than Raspi). See this internal link. The idea is 1. use Arduino will use PIR to sense any movement. If it detects motion, it will print a string to the serial port 2. the python program has an infinite loop that reads the serial port. If the serial port contains a string starts with the 'M' letter, it will send out an email. So the communication here is one way.
openFrameworks (oF)
openFrameworks is an open source C++ toolkit designed to assist the creative process by providing a simple and intuitive framework for experimentation.
GPIO experiments
Processing
Power off and on
http://raspi.tv/2012/making-a-reset-switch-for-your-rev-2-raspberry-pi
When we use a diy wire to connect two holes, it will shutdown the RPi immediately. If we disconnect the 2 holes, it will power on the RPi again. I tested it on my Model B running the OpenElec OS. COOL:)
For model B+/Pi 2 model B, see this post. This post also provides another way (GPIO pins 5&6) to shut down RPi.
This has pictures for all raspi models.
Connect to console using TTL/Serial cable
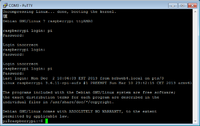
I purchased the TTL cable through dealextream.com. The RaspPi is power by the microUSB (Or we can use the 5V pin on TTL module to connect to 5V on RaspPi. If I try to use 3.3V pin on TTL module to connect to either 3.3V or 5V on RaspPi, it does not work). The connection is done by
   RaspPi    TTL
   =========
   5V          5V
   GND       GND
   TX (14)   RX
   RX (15)   TX
Note that it takes 45 seconds for the screen to respond when I tested it using Putty. The ACT and PWR lights should be on. The tuturial on adafruit is helpful.
C libraries
- wiringPi and GPIO examples
- http://www.airspayce.com/mikem/bcm2835/
- http://elinux.org/RPi_Low-level_peripherals
- C vs Python
GPIO layout
The following picture was taken from www.raspberrypi-spy.co.uk
The following cheatsheet was taken from http://raspi.tv/wp-content/uploads/2013/04/raspberry-pi-gpio-cheat-sheet.jpg
WebIOPi
WebIOPi is a REST framework and a webapp which allows you to control Raspberry Pi's GPIO. It does not require apache to be installed. So we can use web browser from Android to control the GPIO in Raspbery Pi ... Another choice is Web.py.
Run Python using webiopi module
sudo python -m webiopi 8000
Start/stop the background service
sudo /etc/init.d/webiopi start
sudo /etc/init.d/webiopi end
Start webiopi at startup:
sudo update-rc.d webiopi defaults
Note that we shall browse to http://localhost:8000/ instead of http://localhost:8000/webiopi. If something is still wrong, use a different port. The default user is "webiopi" and password is "raspberry".
It seems the code is still not stable. I kept getting a message "Error response" Error code 404. Message: Not Found. Error code explanation: 404 = Nothing matches the given URI.
Web.py
See the article The Python Pit - drive your Raspberry Pi with a mobile phone in http://www.themagpi.com/en/issue/9.
Circuit and Electronics
- 電路與電子學
- Circuits and Electronics by MIT
Blink a single LED
I follow the instruction in https://projects.drogon.net/raspberry-pi/gpio-examples/tux-crossing/gpio-examples-1-a-single-led/ to install gpio program/library in raspberry pi. Here is the result
- without PI cobbler: check out my video
<youtube>xWJZRK4W13Q</youtube>
- with PI cobbler: see the picture below. The soldering part is not easy for a beginner. Be sure to follow some instruction on youtube videos to begin with. Note that the white stripe is on the edge closest to the SD card.
- Another example by using C++ code. No extra library needs to be installed. http://hertaville.com/2012/11/18/introduction-to-accessing-the-raspberry-pis-gpio-in-c/. The site also shows the program to create the diagram is from http://www.fritzing.org.
- Python approach. Here it is assumed pin 9 (or 6) is used for GND and pin 11 for GPIO17 (see the GPIO layout above). The LED was connected using a 330 ohm resistor in series with pin 9 (or 6) and 11 to limit the current.
import RPi.GPIO as GPIO
import time
# blinking function
def blink(pin):
        GPIO.output(pin,GPIO.HIGH)
        time.sleep(1)
        GPIO.output(pin,GPIO.LOW)
        time.sleep(1)
        return
# to use Raspberry Pi board pin numbers
GPIO.setmode(GPIO.BOARD)
# set up GPIO output channel
GPIO.setup(11, GPIO.OUT)
# blink GPIO17 50 times
for i in range(0,50):
        blink(11)
GPIO.cleanup()
- Google: raspberry pi python led
RGB
http://www.instructables.com/id/Using-a-RPi-to-Control-an-RGB-LED/?ALLSTEPS
16x2 LCD
http://learn.adafruit.com/drive-a-16x2-lcd-directly-with-a-raspberry-pi. The '16x2' LCD means it can show 16 characters per row and there are 2 rows in total. Each character consists of 8x5 (height x width) dots.
http://makezine.com/projects/build-a-compact-4-node-raspberry-pi-cluster/ also tells how to show the IP on the LCD.
8x8 Matrix LED Backpack (I2C)
http://learn.adafruit.com/matrix-7-segment-led-backpack-with-the-raspberry-pi/overview
Another more versatile output from the 8x8 matrix is by using C program. See Mark Williams blog.
I also create a version of launching LED using R. See my youtube video. <youtube>TwoWrPp6_iw</youtube>
IR Remote with XBMC
http://learn.adafruit.com/using-an-ir-remote-with-a-raspberry-pi-media-center
Stepper motor
CamJam Edukit 3 Robotics Kit
Ryanteck Budget Robotics Kit
https://www.indiegogo.com/projects/ryanteck-budget-robotics-kit-for-raspberry-pi
The software control is based on Spacebrew
HummingBird robot
http://www.hummingbirdkit.com/learning/tutorials/raspberry-pi
Power Raspberry Pi by AA batteries
http://www.raspberrypi-spy.co.uk/2013/04/raspberry-pi-aa-battery-shoot-out/
This also teaches to know how long the battery will die by using Putty and linux command
watch -n 60 uptime
Power Raspberry Pi by Lipo batteries
- https://learn.adafruit.com/pocket-pigrrl?view=all
- Building our own backup server using the Raspberry PI & MainWP
Solar power
Add a push button
- https://learn.adafruit.com/playing-sounds-and-using-buttons-with-raspberry-pi?view=all Play sound
- https://sanje2v.wordpress.com/2014/02/16/adding-shutdownrestart-pushbutton-for-raspberry-pi/ shutdown
- https://embeddedcode.wordpress.com/2013/10/18/adding-a-shutdown-button-to-the-raspberry-pi/ shutdown
- http://www.raspberry-pi-geek.com/Archive/2013/01/Adding-an-On-Off-switch-to-your-Raspberry-Pi shutdown switch
- http://www.instructables.com/id/Raspberry-Pi-Internet-Monitor/?ALLSTEPS Internet monitor with a shutdown switch
Speech synthesis and a push button
Festival speech package
sudo apt-get install festival
# Add voice file
sudo apt-get install festvox-rablpc16k # British English
sudo apt-get install festvox-kallpc16k # American English
Speaking
echo "Hello World!" | festival --tts

wget http://history.eserver.org/jefferson-inaugural.txt
festival --tts jefferson-inaugural.txt
Speak Easier: Flite
sudo apt-get install flite

flite -t "All good men come to the aid of the rebellion"
flite -f jefferson-inaugural.txt

flite -lv
flite -voice awb -t "The Raspberry Pi is a great Maker platform!"
Fun Uses for Speech
sudo apt-get install fortune-mod
fortune | flite
Wav output
flite -t "Shall we play a game?" -o wargames1.wav
aplay wargames1.wav
Reading the Weather
sudo apt-get install weather-util
weather washington
weather -q fips1600190345 | flite
Playing sounds using push buttons (Python).
Use a Simple Button to Control LED
The following site has some elaboration about 'pull down' of resistors. http://www.cl.cam.ac.uk/projects/raspberrypi/tutorials/robot/buttons_and_switches/
Get a Flashing Meeting Reminder with a Raspberry Pi
http://makezine.com/projects/get-a-flashing-meeting-reminder-with-a-raspberry-pi/
Using a servo motor, PWM
http://learn.adafruit.com/adafruits-raspberry-pi-lesson-8-using-a-servo-motor?view=all
LED dimming using software PWM (pulse-width modulation)
http://raspi.tv/2013/how-to-use-soft-pwm-in-rpi-gpio-pt-2-led-dimming-and-motor-speed-control
Reading analog input using external ADC (analog to digital converter) MCP3008
Reading temperature
https://learn.adafruit.com/adafruits-raspberry-pi-lesson-11-ds18b20-temperature-sensing?view=all
Raspberry Pi has no ADC (Analog to Digital Converter), it cannot directly use an analog temperature sensor like the TMP36.
http://www.cyberciti.biz/faq/linux-find-out-raspberry-pi-gpu-and-arm-cpu-temperature-command/
# GPU
/opt/vc/bin/vcgencmd measure_temp

# CPU
cpu=$(</sys/class/thermal/thermal_zone0/temp)
echo "$((cpu/1000)) c"
and putting them together
#!/bin/bash
# Script: my-pi-temp.sh
# Purpose: Display the ARM CPU and GPU  temperature of Raspberry Pi 2/3
# Author: Vivek Gite <www.cyberciti.biz> under GPL v2.x+
# -------------------------------------------------------
cpu=$(</sys/class/thermal/thermal_zone0/temp)
echo "$(date) @ $(hostname)"
echo "-------------------------------------------"
echo "GPU => $(/opt/vc/bin/vcgencmd measure_temp)"
echo "CPU => $((cpu/1000))'C"
For my Raspberry Pi 3, the temperature is 52C when it is idle. The temperature can go up to 84C when I build R 3.3.1.
MCP23017 GPIO expander (extra 16 pins)
- http://learn.adafruit.com/mcp230xx-gpio-expander-on-the-raspberry-pi
- http://raspi.tv/2013/using-the-mcp23017-port-expander-with-wiringpi2-to-give-you-16-new-gpio-ports-part-3
Serial Peripheral interface (SPI)
http://www.brianhensley.net/2012/07/getting-spi-working-on-raspberry-pi.html
Camera
raspivid -o myvid.h264 -t 60000
# 60 seconds. Default is 6 seconds which generates 10MB for 1080p, 6.4MB for 720p.
raspivid -o myvid.h264 -t 60000 -vf -hf # fix upside-down
raspivid -o myvid.h264 -w 1280 -h 720   # 1280 x 720 instead of 1920 x 1080
raspivid -o myvid.h264 -w 1280 -h 720 -rot 180 # rotation 180 degree
raspivid -o myvid.h264 -w 1280 -h 720 -b 8000000
# “8000000” is a bitrate of 8000Kbs (kilo bits per second) or 8Mb (8 mega bits per second).
# The default is usually 17000000.

# convert h264 to mp4
sudo apt-get install -y gpac
MP4Box -fps 30 -add myvid.h264 myvid.mp4

# play the video
omxplayer myvid.h264
omxplayer myvid.mp4
- http://elinux.org/Rpi_Camera_Module. There are several Android apps to control the camera (Pi or USB) on Raspberry Pi. For example, RaspiCam Remote.
- NoIR http://www.raspberrypi.org/learning/infrared-bird-box/
- Motion Guide
- Surveillance camera by codeproject.com. The same one is also hosted on instructables.com.
- http://www.home-automation-community.com/surveillance-with-raspberry-pi-noir-camera-howto/ (take care of user 'motion').
sudo usermod -a -G motion pi
sudo chown motion:motion /home/pi/images
sudo service motion start
To rotate the image, change 'rotate 0' to 'rotate 180' by sudo nano /etc/motion.conf (still not right).
- http://pingbin.com/2012/12/raspberry-pi-web-cam-server-motion/ (regular webcam is used)
- A post from opsactive.com. Similar to the above.
- Turn a Raspberry Pi into a CCTV Security System from averagemanvsraspberrypi.com.
Dash Cam
- http://pidashcam.blogspot.com/ (with mounting pictures) or http://pidashcam.blogspot.nl/
- http://www.raspberrypi-spy.co.uk/2014/11/how-to-create-a-raspberry-pi-video-capture-unit-part-1/ (with mounting pictures)
- https://programmaticponderings.wordpress.com/2013/06/30/low-cost-dashboard-camera-using-motion-ffmpeg-and-the-raspberry-pi/
- http://www.dreamgreenhouse.com/projects/2013/picar/index.php
- http://www.stuffaboutcode.com/2013/10/raspberry-pi-car-cam-gps-data-map.html
- A RASPBERRY PI HELMET CAM WITH GPS LOGGING
- DIY WiFi Raspberry Pi Touchscreen Camera
- http://zachhuff386.github.io/dashcam/
- http://hackaday.com/2014/11/01/delicious-dash-pi-driving-data/
Create a button-operated camera
https://www.raspberrypi.org/magpi-issues/MagPi45.pdf p27
Live stream and Cam Web Interface
http://elinux.org/RPi-Cam-Web-Interface as used in portable streaming camera
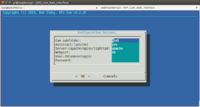
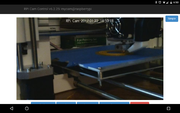
The installation is quite simple and the basic installation just works (1/21/2017) with my Pi Camera v2. By default, I can access the live stream by visiting http://raspberrypi.local/html/. The web interface allows me to change camera settings (eg flip image), record video, record image, timelapse, etc. Quite amazing. The first screenshot shows one text dialog during installation and the 2nd screenshot shows the web interface. By default, the live stream will be auto-start. It can be installed on Raspbian-Lite too.
Security Camera
- http://pimylifeup.com/raspberry-pi-security-camera/
- http://www.techradar.com/us/news/computing/how-to-guard-your-home-with-the-raspberry-pi-1301336/1
- Raspberry Pi as low-cost HD surveillance camera. Some highlights includes installing the motion detection software, saving videos on Windows shared folder, and accessing the live stream.
Pan and tilt security camera controlled by Arduino
http://www.makeuseof.com/tag/diy-pan-and-tilt-network-security-cam-raspberry-pi/
Slow motion
http://www.averagemanvsraspberrypi.com/2015/07/raspberry-pi-camera-module-slow-motion-video.html
Motion triggered infrared wildlife camera
How Do Night Vision Cameras Work?
Baby monitor
Tiddlybot
- https://www.kickstarter.com/projects/1320310506/tiddlybot-fun-and-simple-raspberry-pi-robot/comments
- https://www.shopstarter.com/s/Tiddlybot/
- http://www.pibot.org/tiddlybot/
- https://github.com/Agilic-Development
- https://github.com/discoverycode/discoverybot_api The Discovery Bot
- http://www.pibot.org/tiddlybot/images/ V1.1 image download link
- http://pibot.org/forum/index.php Forum
- Two recommended wifi adapters: Edimax EW-7811Un, and the TP link TL-WN725N
- http://pibot.org/forum/index.php?topic=45.0 Pin out with a nice graph
- http://pibot.org/forum/index.php?topic=50.0 Raspi A+ is better than V2 in terms of power consumption. See also this post & this new one from raspi.tv.
- Turn on wifi (pc/tablet/phone) and connect to TiddlyBot_01 SSID with the password 'Raspberry'. Use the address http://192.168.42.1. When we turn on RasPi, we shall see the wifi led keep flashing. If not, eject uSD and insert again (and boot). If we connect RasPi to a monitor, it will drop to the shell. The default username/password is pi/raspberry (lower case).
The battery it includes is Nokia BL-5C 1020mAh 3.7V 3.8Wh ~ $5.35 US. Note that the battery has 3 pins. One of them labelled as T is for temperature.
To turn off the robot, switch the slider to the buzzer.
To run a small dhcp server, it uses udhcpd.
pi@raspberrypi ~ $ sudo service --status-all
 [ ? ]  alsa-utils
 [ - ]  bootlogs
 [ ? ]  bootmisc.sh
 [ ? ]  cgroup-bin
 [ ? ]  checkfs.sh
 [ ? ]  checkroot-bootclean.sh
 [ - ]  checkroot.sh
 [ - ]  console-setup
 [ + ]  cron
 [ + ]  dbus
 [ ? ]  dphys-swapfile
 [ ? ]  fake-hwclock
 [ + ]  hostapd
 [ - ]  hostname.sh
 [ ? ]  hwclock.sh
 [ + ]  ifplugd
 [ - ]  kbd
 [ - ]  keyboard-setup
 [ ? ]  killprocs
 [ ? ]  kmod
 [ - ]  lightdm
 [ - ]  motd
 [ ? ]  mountall-bootclean.sh
 [ ? ]  mountall.sh
 [ ? ]  mountdevsubfs.sh
 [ ? ]  mountkernfs.sh
 [ ? ]  mountnfs-bootclean.sh
 [ ? ]  mountnfs.sh
 [ ? ]  mtab.sh
 [ ? ]  networking
 [ - ]  nfs-common
 [ + ]  ntp
 [ ? ]  plymouth
 [ ? ]  plymouth-log
 [ - ]  procps
 [ ? ]  raspi-config
 [ ? ]  rc.local
 [ - ]  rmnologin
 [ - ]  rpcbind
 [ - ]  rsync
 [ + ]  rsyslog
 [ ? ]  screen-cleanup
 [ ? ]  sendsigs
 [ + ]  ssh
 [ - ]  sudo
 [ + ]  triggerhappy
 [ + ]  udev
 [ ? ]  udev-mtab
 [ ? ]  udhcpd
 [ ? ]  umountfs
 [ ? ]  umountnfs.sh
 [ ? ]  umountroot
 [ - ]  urandom
 [ - ]  x11-common
Live stream to youtube
Live Stream to YouTube With a Raspberry Pi from makeuseof.
ESP8266
Connect an ESP8266 to your RaspberryPi
IFTTT
See Fridge monitor (p41-45) of TheMagPi September 2015.
Control a 12V lamp with GPIO ZERO
http://raspi.tv/2015/gpio-zero-test-drive-making-light-of-security
Grandpa scarer & Laser cutter
https://www.raspberrypi.org/learning/grandpa-scarer/worksheet/
Other cool stuff
Home Automation
Track Internet Dropouts
- http://makezine.com/projects/send-ticket-isp-when-your-internet-drops/. Keywords: speedtest-cli, cron, IFTTT, google spreadsheet.
- PCWorld
GPS tracker
http://blog.initialstate.com/new-python-gps-tracker/
Retro Game Console/Emulator
- RetroPie
- Super Ninetendo Pi
- Running OpenGL-based Games & Emulators on Adafruit PiTFT Displays
- Linux Gaming: Nintendo 64 Emulation on Odroid.
- ROMS
- http://www.freeroms.com/
- http://coolrom.com/emulators/psp/
- http://www.emuparadise.me/PSP_ROMs/
- http://romhustler.net/roms/psp
- http://www.downarea51.com/2014/04/daftar-game-iso-psp.html#.VzXUlZ5H8_t
- http://www.portalroms.com/en/isos/psp (include covers)
- https://www.youtube.com/watch?v=cdGSH5vy2Xw (some examples)
- SNES EZ Key Bluefruit Game Pad
- http://makezine.com/projects/build-retro-gaming-console-raspberry-pi/
- http://lifehacker.com/how-to-turn-your-raspberry-pi-into-a-retro-game-console-498561192
- Pixel Vision - a console capable of emulating some of the most classic game systems.
Username: pi, password: raspberry. See RetroPie wiki.
$ ssh [email protected]
[email protected]'s password:

The programs included with the Debian GNU/Linux system are free software;
the exact distribution terms for each program are described in the
individual files in /usr/share/doc/*/copyright.

Debian GNU/Linux comes with ABSOLUTELY NO WARRANTY, to the extent
permitted by applicable law.
Last login: Wed May 11 17:35:37 2016 from 10.42.0.1

   .~~.   .~~.    Wednesday, 11 May 2016,  5:36:53 pm UTC
  '. \ ' ' / .'   Linux 4.1.19+ armv6l GNU/Linux
   .~ .~~~..~.
  : .~.'~'.~. :   Filesystem      Size  Used Avail Use% Mounted on
 ~ (   ) (   ) ~  /dev/root        15G  2.2G   12G  16% /
( : '~'.~.'~' : ) Uptime.............: 0 days, 00h04m04s
 ~ .~       ~. ~  Memory.............: 114884kB (Free) / 250692kB (Total)
  (   |   |   )   Running Processes..: 70
  '~         ~'   IP Address.........: 10.42.0.37
    *--~-~--*     Temperature........: CPU: 46°C/114°F GPU: 46°C/114°F
                  The RetroPie Project, http://www.petrockblock.com

pi@retropie:~ $ df -h
Filesystem      Size  Used Avail Use% Mounted on
/dev/root        15G  2.2G   12G  16% /
devtmpfs        119M     0  119M   0% /dev
tmpfs           123M     0  123M   0% /dev/shm
tmpfs           123M  8.5M  114M   7% /run
tmpfs           5.0M  4.0K  5.0M   1% /run/lock
tmpfs           123M     0  123M   0% /sys/fs/cgroup
/dev/mmcblk0p1   57M   20M   38M  35% /boot
Three great games from GameMaker: Studio =
https://www.raspberrypi.org/blog/three-great-gamemaker-games-raspberry-pi/
Raspberry Pi Based Wireless FM Microphone
http://www.instructables.com/id/Raspberry-Pi-Based-Wireless-Microphone/?ALLSTEPS
Dashboard/Kiosk by dashing.io
- See the article USE AN ODROID-C1 AS A WALL DASHBOARD on 2015/5 ODROID magazine
- http://www.fusonic.net/en/blog/2013/07/31/diy-info-screen-using-raspberry-pi-dashing/
- Search google: dashing raspberry pi
Go to space
- Raspberry Pi in space (nearly) 35.5 km Pi balloon launch and a GoPro version.
OpenCV
- Face recognition treasure box from adafruit.
Wii Remote, bluetooth
- Wii remote based on CWiid Python library (it works on my UDOObuntu 2). Another very similar example.
- Controlling an i-racer RC car using a Wii Balance Board and Raspberry_Pi
- Wii Nunchuck and C code. This is based on Python.
- WiiChuck Adapter
- CamJam Edukit 3 Robotics Kit no instruction.
Wii balance board
- Smart beer fridge with wii balance board and Raspberry Pi (ARM). The weight scale example works fine when I tested on UDOO. Plus there are only 3 packages to install (python-bluetooth, bluez and python-gobject).
- Wii balance board with GUI (tested it on UDOObuntu 2 beta2 based on Ubuntu 14.04.3 LTS, Nov 2015).
sudo apt-get install autoconf autogen automake gcc bluetooth libbluetooth3-dev \
          libgtk2.0-dev pkg-config python2.7-dev flex bison git-core \
          libbluetooth-dev python-pygame python-tk
          # NOTE: libbluetooth2-dev becomes libbluetooth3-dev now
          #       python2.5-dev becomes python2.7-dev now
sudo apt-get install bluez
                                                   # no need to create wiibalance directory
git clone https://github.com/abstrakraft/cwiid.git # the svn method does not work
                                                   # 131 commits. Last commit is Feb 21, 2010.
cd cwiid
autoconf  # if something messed up, run 'autoreconf'

# Follow http://wiki.labomedia.org/index.php/Blender:Wiimote_:_Compilation_de_cwiid_sur_Linux_Mint_12
#   to fix an error "wmdemo undefined reference to symbol str2ba" when running 'make'
#   That is, edit wmdemo/Makefile.in line 11
#   LDLIBS += -lcwiid -lbluetooth
# make clean
./configure        # no need of '--libdir=/usr/lib'
make
sudo make install

# Test Wii remote with GUI
sudo wmgui/wmgui

cd python
sudo python setup.py install
#  install the Wii balance board software:
git clone git://github.com/videntity/python-omhe.git
cd python-omhe
sudo python setup.py install

# Install pycurl; see https://www.raspberrypi.org/forums/viewtopic.php?f=32&t=103188
sudo apt-get install python-pycurl
sudo python ./omhe/hardware/wiibalance/wiibal-weighdemo.py
# Strangely, the code is for bal board but the instruction is for Wiimote
# Just ignore this test and/or its result

wget http://abstrakraft.org/cwiid/raw-attachment/ticket/63/scalesgui.py
wget http://abstrakraft.org/cwiid/raw-attachment/ticket/63/system.ini
chmod a+x scalesgui.py
sudo python ./scalesgui.py  # no need to change the code
                            # <system.ini> and <scalesgui.py> are in the same dir
                            # On my 800x480 display, I change <system.ini> file
                            # width=1200 -> 800, height=960 -> 420, size=300 -> 50
#  to exit the program you should press the “F12” key.
Robot control
- http://www.cl.cam.ac.uk/projects/raspberrypi/tutorials/robot/robot_control/
- Linux User & Developer 132
Compile R from source
Tested on R 3.0.1
- cd R-3.0.1
- ./configure --with-recommended-packages=no
- sudo apt-get install openjdk-7-jdk
- nano src/library/tools/R/install.R and pass "perl = TRUE" to sub()
SHLIB_EXT <- sub(".*= ", "", grep("^SHLIB_EXT", mconf, value = TRUE), perl = TRUE)
SHLIB_LIBADD <- sub(".*= ", "", grep("^SHLIB_LIBADD", mconf, value = TRUE), perl = TRUE)
to get rid of the error gcc: error: SHLIB_LIBADD: No such file or directory.
- make
Google Coder
PS. Code is based on node.js (Early version of shiny-server also depends on node.js).
http://pi.gadgetoid.com teaches us how to install Coder on a Raspberry Pi running on Raspbian. Note that Coder can turn Raspberry Pi into a web server. We can develop the code on a remote computer.
In fact, it is possible to run Code for Raspberry Pi on your own PC. Just run 7 lines of script at here. Note: My experience shows it is safe to use the version on Sep-17-2013; otherwise you'll get the following error when using 'nodejs server.js'
$ nodejs server.js
no certificate found. generating self signed cert.

module.js:337
    throw new Error("Cannot find module '" + request + "'");
          ^
Error: Cannot find module '/home/pi/coder/coder-base/apps/auth/app'
So the successful steps to install coder on Ubuntu is
- download zip file from Sep-17-2013 tree
- cd coder-base; npm install
- modify 'config.js'
- launch it by 'node server.js'.
I don't have to use sudo when I use 'npm install' and 'node server.js'.
The password requirement for coder is at least 6 characters, at least one lower case and at least 2 upper cases or numbers.
Also, on Ubuntu it will complain the user 'pi' does not exist. So we shall do this 'sudo adduser pi' too. Pick the same password as we use in coder (eg Raspberry99).
Update: After I played with it, I found Coder does not let us work on more than one HTML, CSS or Javscript file. This makes the development more difficult.
Another choice is to run Cloud9 IDE on RPi. The Cloud 9 IDE was preinstalled on Beaglebone black/
Wolframe Mathematica
- http://www.wolfram.com/raspberry-pi/
- http://www.wolfram.com/broadcast/video.php?channel=105/?fp=left&video=1571 (Video)
- http://www.raspberrypi.org/archives/5282
- http://www.raspberrypi.org/phpBB3/viewtopic.php?t=61746&p=459159 (Download locally first)
For some reason, the Mathematica is not shown on the menu (it only happened on self-installed version). We can start Mathematica from the command line
/usr/bin/mathematica
We can try a 3D plot like seen in youtube
Plot3D[Sin[x*y], {x,0,Pi}, {y,0,Pi}]
The following screenshot shows how to calculate the derivative of f(x)=sin(x)*exp(2x) using Wolfram.
- Note that the language is case-sensitive. For example, sin[x] is not recognized and it should be Sin[x].
- Wolfram language uses square brackets instead of parentheses for function's arguments.
- See this page for Wolfram language & system documentation.
- Another way is to type D[Sin[x] * Exp[2x], x]
Note that Mathematica is a GUI program so it is kind of slow when it is running on Raspberry Pi. The Wolfram program is a command line interface program so it is much faster although we can not do any plotting there.
Use RaspPi as Media Center
http://www.packtpub.com/raspberry-pi-media-center/book
Record TV
- http://www.redrobe.com/mike/record-tv-on-raspberry-pi-with-tvheadend/. This is from the same author of Raspicam Remote for Android.
Bitcoin Miner
- http://www.linuxuser.co.uk/tutorials/mine-bitcoins-with-raspberry-pi
- https://learn.adafruit.com/piminer-raspberry-pi-bitcoin-miner/initial-setup-and-assembly
Turn Raspi into a wireless hotspot / access point
I am using TP-LINK TP-WN722N wifi adapter.
- (Not stable) http://elinux.org/RPI-Wireless-Hotspot. Also see some of my notes on Beaglebone page. The instruction asks to install hostapd and udhcpd (not dhcp). I made a copy of the changed files in Github. It appears there is a typo on the /etc/udhcpd.conf file. See Setting up Pi as a Wifi Hotspot. That is, use option instead of opt on subnet and lease lines. Issue 1: I have a problem with automatically or manually starting udhcpd service. Issue 2: even the hotspot is connected but no internet was found. See
- http://askubuntu.com/questions/699995/hotspot-created-and-connected-from-linux-but-no-internet-access-on-phone
- http://superuser.com/questions/1061849/connected-to-hostapd-hotspot-but-no-internet
- I found out a solution for my case. Running 'ifconfig' and 'route -n', my problem is the wlan0 ip is wrong (becomes 169.254.0.0). So I need to run sudo ifdown wlan0 && sudo ifup wlan0 or better sudo /etc/init.d/networking restart to fix the ip error.
pi@raspberrypi:~ $ route -n
Kernel IP routing table
Destination     Gateway         Genmask         Flags Metric Ref    Use Iface
0.0.0.0         10.42.0.1       0.0.0.0         UG    202    0        0 eth0
10.42.0.0       0.0.0.0         255.255.255.0   U     202    0        0 eth0
169.254.0.0     0.0.0.0         255.255.0.0     U     303    0        0 wlan0
192.168.42.0    0.0.0.0         255.255.255.0   U     0      0        0 wlan0
pi@raspberrypi:~ $ ifconfig
eth0      Link encap:Ethernet  HWaddr b8:27:eb:24:6b:a0
          inet addr:10.42.0.37  Bcast:10.42.0.255  Mask:255.255.255.0
          ...

lo        Link encap:Local Loopback
          inet addr:127.0.0.1  Mask:255.0.0.0
          ...

wlan0     Link encap:Ethernet  HWaddr f8:d1:11:0b:52:6f
          inet addr:192.168.42.1  Bcast:192.168.42.255  Mask:255.255.255.0
          ...
- (Adafruit) Setting up a Raspberry Pi as a WiFi access point by installing hostapd and isc-dhcp-server packages. The instruction works and looks quite stable after I reboot Pi a few times. I found I don't need to run the final two lines to start the daemon services.
sudo service hostapd status
sudo service isc-dhcp-server status
- (Adafruit) You can setup wlan0 in standalone mode or bridge it with eth0. Digital Free Library also includes how to set up Raspi as an access point/apache server/dhcp server (but no internet connection).
- http://raspberry-at-home.com/hotspot-wifi-access-point/
- Turn Your Raspberry Pi Into a WiFi Hotspot with Edimax Nano USB EW-7811Un. This instruction is using bridge-utils and hostapd packages.
- Setup Wireless Access Point (WAP) with Hostapd for Debian/Ubuntu by installing hostapd & bridge-utils packages.
- This is a similar post using hostapd and isc-dhcp-server packages.
Midi keyboard
Bike computer
https://www.raspberrypi.org/blog/bike-computer-for-the-myopic/ This build uses the Kindle as a display
OctoPrint
The snappy web interface for your 3D printer.
Connect your printer to a small embedded and WiFi enabled device such as the popular Raspberry Pi, install OctoPrint on it and you have an instant wireless printer.
Block Ads on All Your Devices at Home with Pi-hole
http://piboards.com/2017/01/07/block-ads-on-all-your-devices-at-home-with-pi-hole-and-an-orange-pi/
Alternatives
- BeagleBone Black (no built-in wifi or bluetooth)
- UDOO with built-in wifi. Bluetooth relies on USB.
- ODROID (no built-in wifi or bluetooth)


